
Epic Catering: Canada West Boots
J.P. Henri Join our expert shoemaker for a complete restoration of the Canada West boots, complete with Vibram 132 Montagna welt and midsole. Discover the secrets of the trade and learn repair tips. An adventure of shoemaking know-how not to be missed! 👞🔧 #Craft #ShoeRepair
#Shoemaker, #ShoeRestoration, #Crafts, #ShoeRepair
Transcriptions:
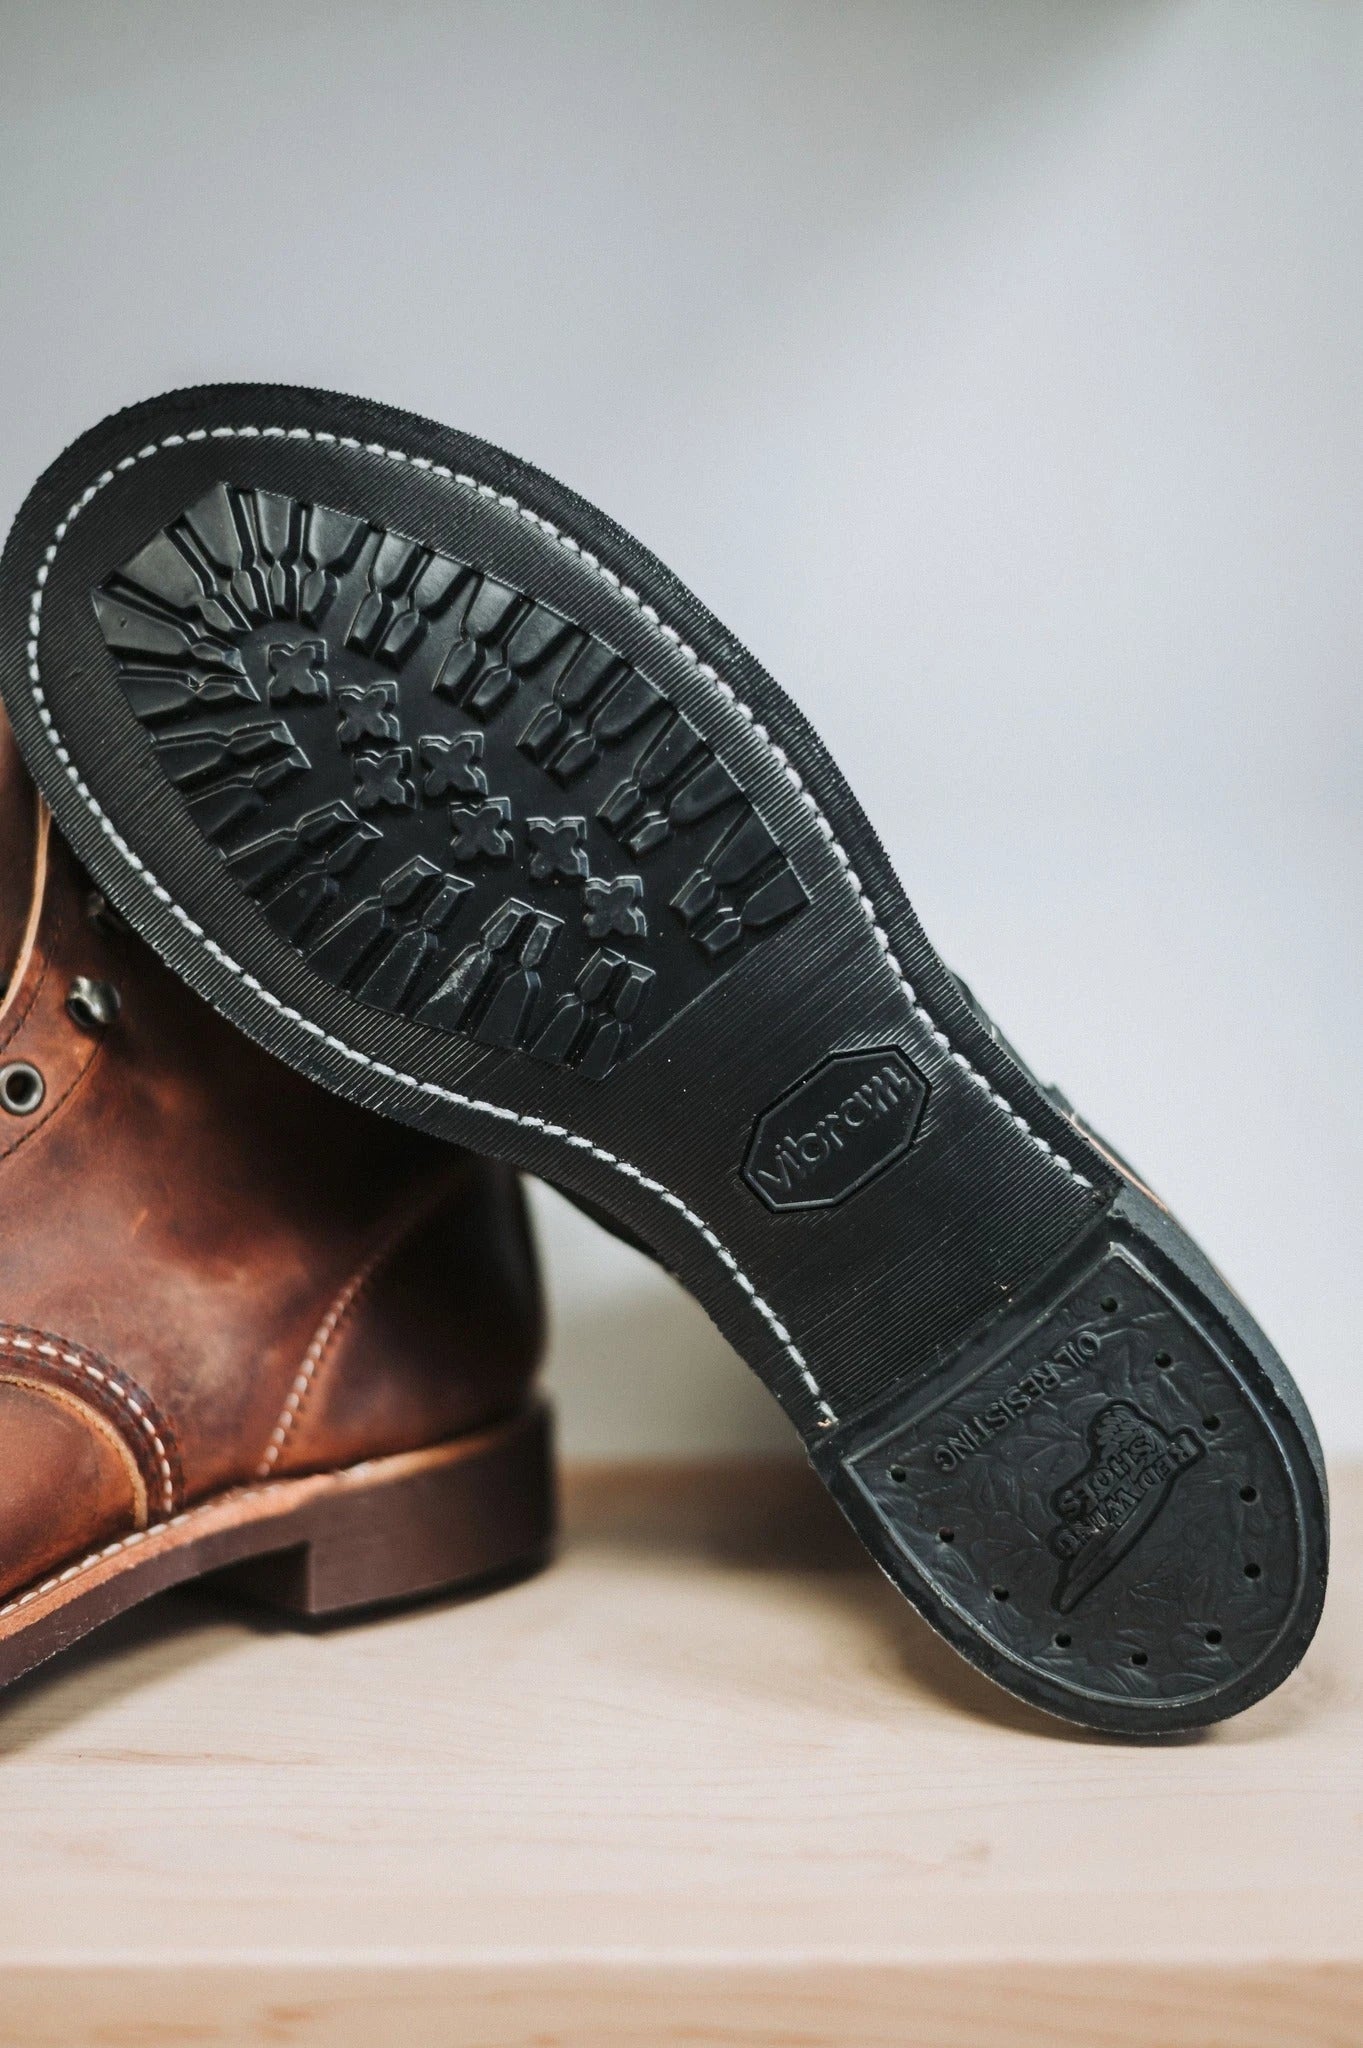
Without further ado, we are going to enter into this super beautiful order a P from bot Canada West boots, an excellent Canadian manufacturer. My customer's share was due for a full restoration adjustment on the order. We gave him the 132 Montagna with new trpoint stormwelt with a leather midsole.
We now prepare all our elements to receive the glue. We are on the coarse-grain finishing bench to make the surfaces abrasive to receive the glue. We are on Vibram Montagna soles number 132.
We have now reached the leather midsole, same principle as rubber. We always like to use grosgrain on the leather to make the material more fibrous. All welt arrives in neutral color on this order, we put it black. Now at the deconstruction stage, we remove everything, the sole component, therefore the sole, the midsole as well as the toe. This is one of the largest orders that we can offer in Gerry's workshop.
In the final stages, we are removing the trimmings to provide the best possible restoration. It's important to remove. We also want to expose the welt seam for removal. We go into detail with our little pic. We now apply the glue to receive the arch. We also want to correct the walls to ensure a good seam. We now apply our glues to our midsole. Subsequently, we have the Vibram 132 Montagna, the first soles to hit the ground.
Wow, I decided to offer the shampoo before putting in all the new components. Just the boots are really really dirty. I decided to brush them all before installing the new components. We generously applied liquid soap and now we apply salt soap. We use our horsehair brush available on our website at Gerry 1958.com. We finish by quantifying everything.
Now we come to the most laborious stage of the restoration, the installation of the trpointe. Manufacturers use the Goodar machine to install the welt, which takes approximately 30 seconds per bundle. But in the workshops, we only have access to needles, so it takes 30 to 40 minutes a bunch. The sewing method we use here is Lock Stitch. On an average boot, there are 70 to 80 stitching holes per boot. Once installed, we will just use coarse-grain sandpaper to make the surface fibrous.
Once assembled, we apply our glue. After letting the glues harden, we apply heat and then put it in my pneumatic press. We are simply removing the excess to go to my finishing bench. Once here, we level the midsole at the welt seam. We use the instrument here to curl at the bottom, we create a cavity in the midsole so that we can accommodate the seam. This step extends the life of the seam.
Once at the mill, we pour the midsole. Internally, we now apply the glue to receive the Vibram 132 Montagna sole. After allowing the glues to harden, they are held on the pneumatic press to install the Vibram sole. We are now on the finishing bench with the large grains, we are giving an outline to the new sole. We have moved on to the small finishing grain, we are in the process of trimming the ends. At the bottom, we remove the excess welt to get a nice finish. Just the thickness of the toe, midsole and 132 is too thick for my mill. We go with screws and nails.
This additional support will ensure a resoling that will last a very long time. True to form, I always have my punch. Now we can finish resoling Gerry. Another super nice order is completed. Subscribe, like, share, let us know in the comments if you like the new format. We really appreciate it.